准备工作
注意!需要4G+内存,并不是说4G以下就无法安装….但是会容易出现无法预知的问题,比如经常出现502页面
安装所需要的依赖包
1 | yum -y install policycoreutils-python openssh-server openssh-clients postfix |
开启postfix
1 | [root@VM_0_5_centos ~]# systemctl enable postfix && systemctl start postfix |
如遇遇到报错,提示
1
Job for postfix.service failed because the control process exited with error code. See "systemctl status postfix.service" and "journalctl -xe" for details.
运行
systemctl status postfix.service查看状态1
2
3
4
5
6
7
8
9
10
11
12
13
14
15
16
17[root@VM_0_5_centos vhost]# systemctl status postfix.service
● postfix.service - Postfix Mail Transport Agent
Loaded: loaded (/usr/lib/systemd/system/postfix.service; enabled; vendor preset: disabled)
Active: failed (Result: exit-code) since Wed 2019-05-15 17:40:25 CST; 8s ago
Process: 2277 ExecStart=/usr/sbin/postfix start (code=exited, status=1/FAILURE)
Process: 2274 ExecStartPre=/usr/libexec/postfix/chroot-update (code=exited, status=0/SUCCESS)
Process: 2269 ExecStartPre=/usr/libexec/postfix/aliasesdb (code=exited, status=75)
May 15 17:40:23 VM_0_5_centos systemd[1]: Starting Postfix Mail Transport Agent...
May 15 17:40:23 VM_0_5_centos aliasesdb[2269]: /usr/sbin/postconf: fatal: parameter inet_interfaces: no local interface found for ::1
May 15 17:40:24 VM_0_5_centos aliasesdb[2269]: newaliases: fatal: parameter inet_interfaces: no local interface found for ::1
May 15 17:40:24 VM_0_5_centos postfix/sendmail[2272]: fatal: parameter inet_interfaces: no local interface found for ::1
May 15 17:40:24 VM_0_5_centos postfix[2277]: fatal: parameter inet_interfaces: no local interface found for ::1
May 15 17:40:25 VM_0_5_centos systemd[1]: postfix.service: control process exited, code=exited status=1
May 15 17:40:25 VM_0_5_centos systemd[1]: Failed to start Postfix Mail Transport Agent.
May 15 17:40:25 VM_0_5_centos systemd[1]: Unit postfix.service entered failed state.
May 15 17:40:25 VM_0_5_centos systemd[1]: postfix.service failed.运行
more /var/log/maillog检查日志1
2
3May 15 00:46:20 VM_0_5_centos postfix/sendmail[31716]: fatal: parameter inet_interfaces: no local interface found for ::1
May 15 17:40:24 VM_0_5_centos postfix/sendmail[2272]: fatal: parameter inet_interfaces: no local interface found for ::1
May 15 17:40:24 VM_0_5_centos postfix[2277]: fatal: parameter inet_interfaces: no local interface found for ::1提示’parameter inet_interfaces: no local interface found for’,检查postfix的inet_interfaces配置
编辑
/etc/postfix/main.cf,修改设置1
2
3
4
5//inet_interfaces = localhost
//inet_protocols = all
//改为
inet_interfaces = all
inet_protocols = all开启postfix
1
2
3
4
5
6
7
8
9
10
11
12
13
14
15
16
17
18[root@VM_0_5_centos vhost]# service postfix start
Redirecting to /bin/systemctl start postfix.service
[root@VM_0_5_centos vhost]# systemctl status postfix.service
● postfix.service - Postfix Mail Transport Agent
Loaded: loaded (/usr/lib/systemd/system/postfix.service; enabled; vendor preset: disabled)
Active: active (running) since Wed 2019-05-15 17:45:36 CST; 4s ago
Process: 3102 ExecStart=/usr/sbin/postfix start (code=exited, status=0/SUCCESS)
Process: 3100 ExecStartPre=/usr/libexec/postfix/chroot-update (code=exited, status=0/SUCCESS)
Process: 3096 ExecStartPre=/usr/libexec/postfix/aliasesdb (code=exited, status=0/SUCCESS)
Main PID: 3181 (master)
CGroup: /system.slice/postfix.service
├─3181 /usr/libexec/postfix/master -w
├─3182 pickup -l -t unix -u
└─3183 qmgr -l -t unix -u
May 15 17:45:35 VM_0_5_centos systemd[1]: Starting Postfix Mail Transport Agent...
May 15 17:45:36 VM_0_5_centos postfix/master[3181]: daemon started -- version 2.10.1, configuration /etc/postfix
May 15 17:45:36 VM_0_5_centos systemd[1]: Started Postfix Mail Transport Agent.
下载安装包
访问 中文镜像站点查看最新的镜像版本,我选的是
11.10.4
2
3
4
5
6
7
8
9
10
11
--2019-05-07 23:23:24-- https://mirrors.tuna.tsinghua.edu.cn/gitlab-ce/yum/el7/gitlab-ce-11.10.4-ce.0.el7.x86_64.rpm
Resolving mirrors.tuna.tsinghua.edu.cn (mirrors.tuna.tsinghua.edu.cn)... 101.6.8.193, 2402:f000:1:408:8100::1
Connecting to mirrors.tuna.tsinghua.edu.cn (mirrors.tuna.tsinghua.edu.cn)|101.6.8.193|:443... connected.
HTTP request sent, awaiting response... 200 OK
Length: 619044408 (590M) [application/x-redhat-package-manager]
Saving to: ‘gitlab-ce-11.10.4-ce.0.el7.x86_64.rpm’
100%[==================================================================================>] 619,044,408 10.4MB/s in 61s
2019-05-07 23:24:48 (9.62 MB/s) - ‘gitlab-ce-11.10.4-ce.0.el7.x86_64.rpm’ saved [619044408/619044408]
安装
1 | [root@VM_0_5_centos ~]# rpm -ivh gitlab-ce-11.10.4-ce.0.el7.x86_64.rpm |
配置
端口
1 | vim /etc/gitlab/gitlab.rb |
刷新应用配置(这一步需要比较长的时间执行)
1 | gitlab-ctl reconfigure |
重启
1 | [root@VM_0_5_centos ~]# gitlab-ctl restart |
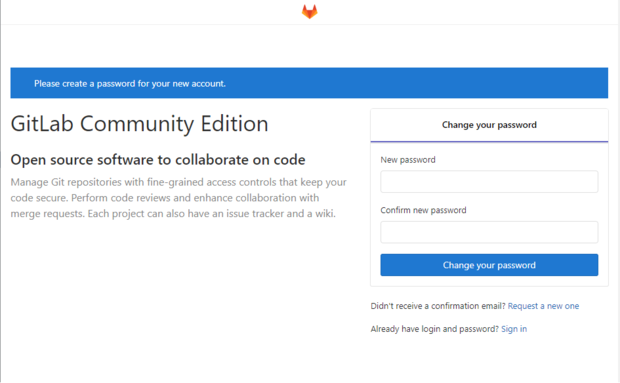
第一次访问,设置密码
问题
访问站点出现502

第一次访问或者低内存情况下会出现,或是其他原因,比如文件权限、端口占用
Nginx冲突
懒人方法,重命名nginx进程,参考 【记一次 gitlab 与老的 nginx 冲突处理】
复制一份 gitlib 下的 nginx
1
mv /opt/gitlab/embedded/sbin/nginx /opt/gitlab/embedded/sbin/nginx2
修改启动脚本
1
vi /opt/gitlab/sv/nginx/run
修改如下内容:
1
2
3exec chpst -P /opt/gitlab/embedded/sbin/nginx -p /var/opt/gitlab/nginx
// 改为
exec chpst -P /opt/gitlab/embedded/sbin/nginx2 -p /var/opt/gitlab/nginx
reboot之后即可,但是如果执行
gitlab-ctl reconfigure,该配置会被还原,切记不要随意reconfigure
使用非绑定的Nginx(兼容本机Nginx)
- 具体参考官网教程,Using a non-bundled web-server,以下只列出操作步骤
- 打开
vi /etc/gitlab/gitlab.rb,也可以通过ftp打开文件编辑 停止使用绑定的Nginx服务
1
nginx['enable'] = false
设置web-server user用户名,这里我nginx使用的是
LNMP,用户名为www,具体应以自己服务器配置而定1
web_server['external_users'] = ['www']
将本机IP添加到gitlab的信任列表中
1
gitlab_rails['trusted_proxies'] = [ '127.0.0.1' ]
设置gitlab的监听端口,以8181端口为例,即访问使用的端口
1
2gitlab_workhorse['listen_network'] = "tcp"
gitlab_workhorse['listen_addr'] = "127.0.0.1:8181"重载配置
1
2gitlab-ctl reconfigure
gitlab-ctl restart
要注意的是,我配置过懒人方法,所以导致进程中有多个nginx,所以此时restart之后无法访问,还是需要
reboot下,可以配置、使用nginx转发,就可以通过域名访问部署好的gitlab
汉化
补丁主页 ,目前最新的补丁是
11.10.2,但是我安装的是11.10.4,但目前没有发现异常`;
下载补丁
1
2
3wget https://gitlab.com/xhang/gitlab/-/archive/11-10-stable-zh/gitlab-11-10-stable-zh.tar.gz
tar -zxf gitlab-11-10-stable-zh.tar.gz
cp -rp /opt/gitlab/embedded/service/gitlab-rails{,.bak_$(date +%F)}覆盖源文件,这里需要使用
/bin/cp -rf,进行强制覆盖,不然会需要一直确认是否覆盖1
/bin/cp -rf gitlab-11-10-stable-zh/* /opt/gitlab/embedded/service/gitlab-rails/
刷新配置、重启
1
2gitlab-ctl reconfigure
gitlab-ctl restart重启之后发现许多内容仍为英文,使用admin进入设置
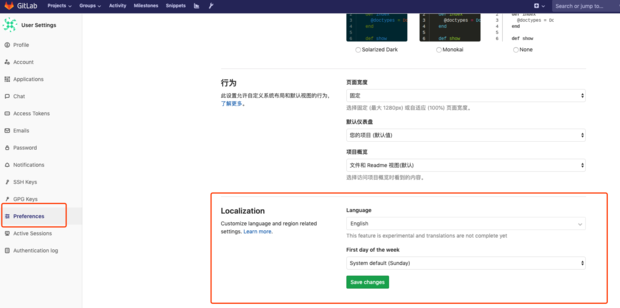
选择Language为简体中文,保存、刷新页面后,内容基本汉化
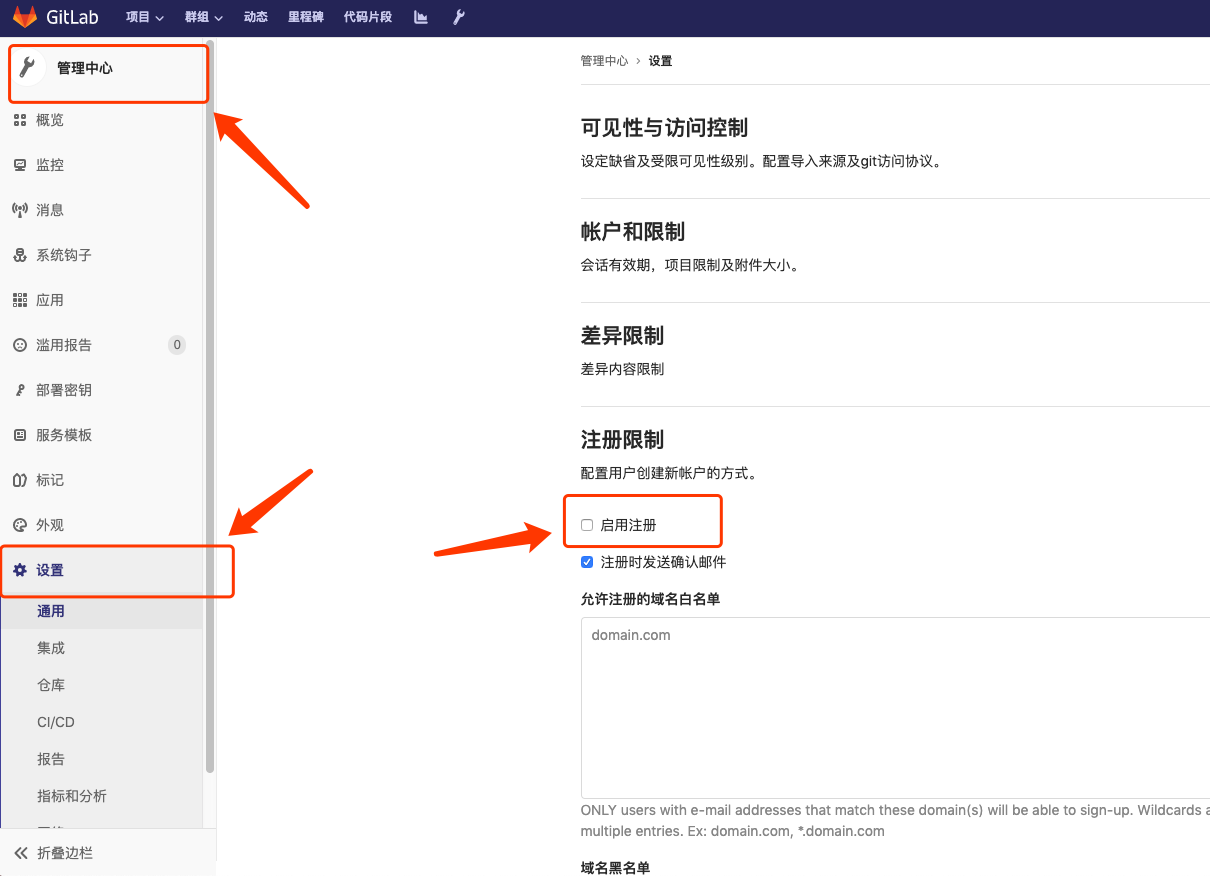
关闭注册功能
进入管理中心 - 设置 -
取消启用注册 - 保存
卸载Gitlab
停止gitlab
1 | ## 卸载gitlab(这块注意了,看看是gitlab-ce版本还是gitlab-ee版本,别写错误了) |
查看gitlab进程
1 | > 杀掉第一个守护进程(runsvdir -P /opt/gitlab/service log) |
再次查看gitlab进程是否存在
删除gitlab文件
1 | find / -name *gitlab*|xargs rm -rf 删除所有包含gitlab的文件及目录 |
删除gitlab-ctl uninstall时自动在root下备份的配置文件(ls /root/gitlab* 看看有没有,有也删除)
通过以上几步就可以彻底卸载gitlab